Flashing the ARM7 board
This document describes the steps that need to be taken to upload the bootloader image into the Flash Memory of the ARM7 processor on the SAM7-LA2 development board with openOCD.
Contents
Prerequisites
Before you start flashing, make sure that you have everything in place:
- The openOCD executable:
This one must match your programmer, either take a precompiled one ("openocd-usbprog.exe" for usbProg or "openocd-ft2232.exe" for ARM-USB-Tiny) or compile it yourself as described in "Compiling OpenOCD.html". - The configuration file for the SAM7-LA2:
Again, it must match your programmer, we provide two examples for usbProg ("at91sam7a2-usbprog.cfg") and ARM-USB-Tiny ("at91sam7a2-ft2232.cfg"). It configures the flash banks and a working area (buffer memory) for OpenOCD. - A script for configuring the ARM7's AMC (Advanced Memory Controller) ("at91sam7a2.script")
- The bootloader image ("bootloader.bin")
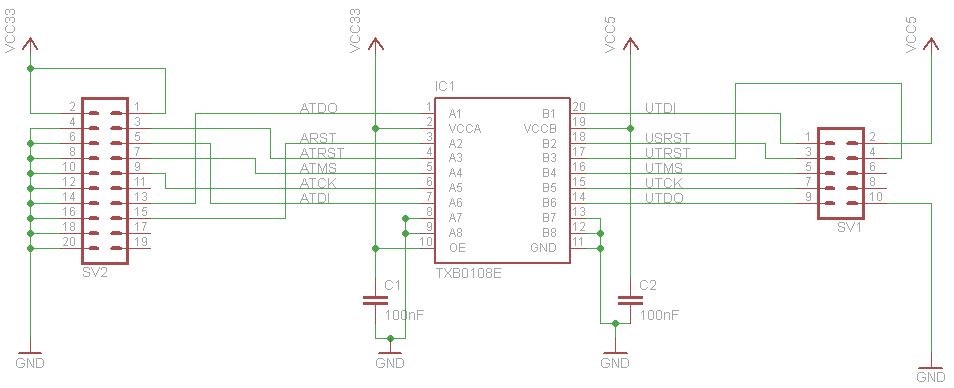
NOTE: These files can be found in our SVN at https://mars.iese.fraunhofer.de/ConceptCar/Documentation/openOCD/, both password and username are "guest" (without the quotes). - If the USBProg is used, a level shifter must be used to mediate between the 5V of the USBProg and the 3.3V of the ARM7 board. An example implementation of such a shifter can be found at https://mars.iese.fraunhofer.de/ConceptCar/Hardware/AT91SAM7A2/JTAG-Level%20Shifter/
Flashing Manually
openOCD session
First you need to open an openOCD session. You do so by opening a DOS command prompt and changing to the directory the above mentioned files reside in. Then you call the appropriate Version of openOCD (here for usbProg):
$ openocd-usbprog.exe -d 3 -f at91sam7a2-usbprog.cfg
Be sure that you call this command from within the correct directory.
NOTE: Depending on the programmer, you may need to install it's drivers first.
Telnet session
To issue commands to openOCD (and thus writinging the ARM7's flash memory), you need to connect to this openOCD session via telnet. Open a second DOS command prompt and change to the same directory again (FIXME: Do you really need to do so?). Then start a telnet session:
$ telnet localhost 4444
All the following commands are issued from within this telnet session.
Preparing the device
The ARM7's AMC (Advanced Memory Controller) needs to be configured before reading and writting to the flash. To do this, run the script "at91sam7a2.script" with the following commands over telnet:
> reset
JTAG device found: 0x1f0f0f0f (Manufacturer: 0x787, Part: 0xf0f0, Version: 0x1)
Unexpected idcode after end of chain! 480 0x800000ff
Unexpected idcode after end of chain! 512 0x0000007f
Unexpected idcode after end of chain! 544 0x000000ff
Unexpected idcode after end of chain! 576 0x000000ff
Unexpected idcode after end of chain! 608 0x000000ff
> halt
target state: halted
target halted in Thumb state due to debug-request, current mode: Supervisor
cpsr: 0x60000033 pc: 0x40001c96
> script at91sam7a2.script
This should configure the AMC and get the flash memory working. To check if the flash is working run the following commands over telnet:
> flash probe 0
flash 'cfi' found at 0x40000000
> flash info 0
#0: cfi at 0x40000000, size 0x00100000, buswidth 2, chipwidth 2
#  0: 0x00000000 (0x4000 16kB) protection state unknown
#  1: 0x00004000 (0x2000 8kB) protection state unknown
#  2: 0x00006000 (0x2000 8kB) protection state unknown
#  3: 0x00008000 (0x8000 32kB) protection state unknown
#  4: 0x00010000 (0x10000 64kB) protection state unknown
#  5: 0x00020000 (0x10000 64kB) protection state unknown
#  6: 0x00030000 (0x10000 64kB) protection state unknown
#  7: 0x00040000 (0x10000 64kB) protection state unknown
#  8: 0x00050000 (0x10000 64kB) protection state unknown
#  9: 0x00060000 (0x10000 64kB) protection state unknown
# 10: 0x00070000 (0x10000 64kB) protection state unknown
# 11: 0x00080000 (0x10000 64kB) protection state unknown
# 12: 0x00090000 (0x10000 64kB) protection state unknown
# 13: 0x000a0000 (0x10000 64kB) protection state unknown
# 14: 0x000b0000 (0x10000 64kB) protection state unknown
# 15: 0x000c0000 (0x10000 64kB) protection state unknown
# 16: 0x000d0000 (0x10000 64kB) protection state unknown
# 17: 0x000e0000 (0x10000 64kB) protection state unknown
# 18: 0x000f0000 (0x10000 64kB) protection state unknown

non-cfi flash:

mfr: 0x00c2, id:0x225b
Flashing the Bootloader
Now is time to write a binary file to the flash. Use the following command to do it:
> flash write_image erase bootloader.bin 0x40000000 bin
auto erase enabled
BUG: keep_alive() was not invoked in the 1000ms timelimit. GDB alive packet not sent! (1422)
NOTE: There is no progress information at all. Sometimes it can take a few minutes to flash the device. Wait until the process is finished to reset the board. In case the flashing process goes wrong, gets aborted or exits abruptly do not worry. Simply repeat the flash command.
Automated Process for Flashing
For quicker & easier board flashing you can let scripts do the above steps. In order to use them, just connect to the openocd telnet server (see steps 1 & 2 above) and type (FIXME: Do we need to run reset and halt?):
> reset
> halt
> script at91sam7a2.script
> script flash.spt
This will flash the board with the bootloader.bin file @ 0x40000000.
